ABOUT ME WIDGET

About
most recent projects
Recent
Showing posts with label Crafts. Show all posts

Tuesday, July 2, 2013

Recently...

My little sister is part of a craft group with a bunch of her friends. They used to meet together every month, but then my sister moved and so she doesn't meet with them - but she still does the crafts. A few months ago she invited me to be a part of the FB group and it went downhill from there.

A few times a month the girl spearheading the group will post a craft and ask who is interested in doing it. She will then go buy the items needed to make the craft and we pay her from there. She posted a couple things in recent months that grabbed my attention, but it also took a couple months to actually get around to doing them.

The first one was a sign for Independence Day and since it's creeping up on us, I figured I'd better get my butt in gear and get it put together. The girl originally found the idea on Pinterest. (I think that's where she gets all of her ideas)

I did mine slightly different and distressed my sign when I was complete. I also made the star blue, when most of the others that did this craft stuck with white.


The next craft was a countdown sign. I laughed at the timing of this craft because I had just started a countdown on my big white board in the kitchen and was thinking to myself, "I should make a real countdown sign of some sort."

So of course I jumped on the bandwagon with this countdown sign:


(It was 50 days until baby, it's now 45! Though I'm praying it's more like 30...)

I apologize for not knowing more about the fonts and materials used for a majority of these projects. Like I said, there was another girl that got all the supplies together - I just actually PUT them together.

SUPPLY LIST

GOD BLESS AMERICA SIGN

Paints
Anita's Acrylic Craft Paint - White (Used as base coat of paint)
Delta Ceramcoat - White (Because I didn't have enough of the above)

String
Unsure


DAYS UNTIL SIGN

Paint

Monday, October 15, 2012

Making Halloween

I love, love, love Halloween. I'm always on the lookout for more Halloween decorations.

This year I headed over to The Wood Connection towards the middle of September and had a hard time making decisions. I could've spent a boatload of money, which I didn't have - so I had to pick and choose.

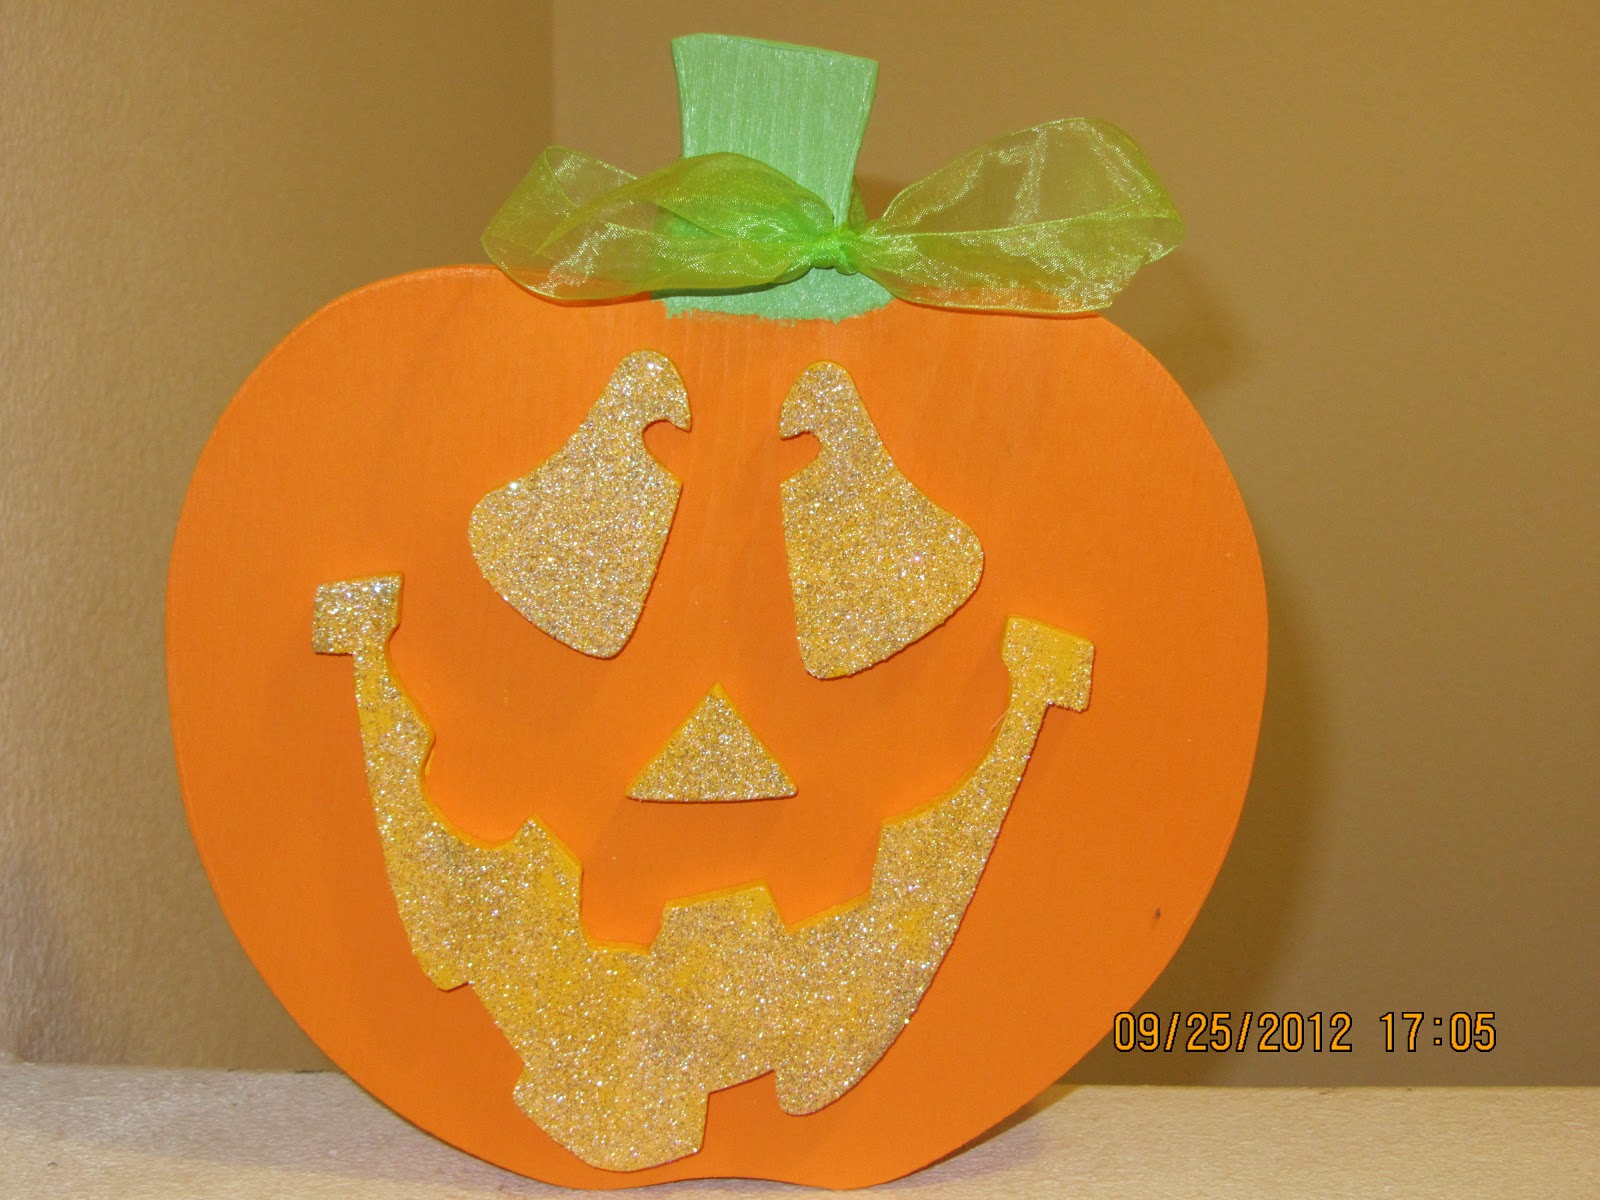
These were the winners...


Then I decided to make use of a wood plaque thing that I bought off our area yard sale group on Facebook. I paid $7 for both, which is a little less than you'd pay for one. When I originally bought them, I didn't know what I was going to do with them, but I knew I'd figure something out eventually and well I've done one project and I know what the other's going to be. Anyway, here's what I did with it using this trick.


These were all so much fun to do and I love having these new decorations for the house.


Friday, December 30, 2011

'Tis The Season

For gift giving and decorating and all that fun stuff.

This post is going to be everywhere as I'm just making a single post for all the Christmas fun we made this year....Are you ready for the ride?

To start we'll begin with a couple decorations I made for the season. (Not that we really needed anything else - but it was my birthday and I spent my money on it. I was happy.)

Here are my Christmas people:


Now the sales girl made a comment about the soldier and said not many people buy the soldier. I didn't say anything to her because it was BLACK FRIDAY and the place was PACKED, but I will share my reason with you.

Years ago, when I was a little girl, I remember my Dad making this soldier out of flower pots. It was awesome and I was in love with these cute little soldiers. Plus seeing my Dad doing something so creative was interesting. So I've had a place in my heart for soldiers for years!

The elf was just cute and Santa well - it's SANTA!

And not that it means anything, I just thought it was cute so I also bought this:


Next comes the neighbor gift.

I'm usually the girl who has tons of cool ideas for gifts to give the neighbors BUT Christmas comes and goes WAY TOO FAST and before I know it the neighbors are forgotten. This year I was going to be better and I made my mind up to do so.

So shortly after my birthday I made Eric take me to The Wood Connection. I knew exactly what I wanted to do and darn it all I was going to make neighbor gifts this year!

This is what I made:


I do like some better than others, but I won't say which way is which.

And guess what? I realized I forgot 4 of our bestest friends in the neighborhood. Who does that? Me! So, it was back to The Wood Connection so I could finish up with these:


Not sure I'm as crazy about the color combo of these ones, but at least one of the families really liked the coloring and it went GREAT in their living room.

Because I didn't keep busy enough with little individual letters, I gave myself more work to do.

Both my Daddy and my Father in Law are BYU Cougar fans and when I saw these letters at The Wood Connection I knew I had found THE PERFECT Christmas gift for my Dad's. These are their 'Y's':


I laughed because both men asked what the twine was for. Men just don't get the whole 'making things a little more cutesy' aspect. I just didn't feel it was complete until the twine was put on.

For my uncle I did a subway art thing. He's had a difficult life, so I wanted to put words that would uplift him and memories that made him happy on it. I think it made a real impression with him:


My older brother recently moved to France to teach. He wasn't able to come home for Christmas and my mom wanted to do something for him, but didn't know what. I had the BRILLIANT (LOL) idea to have each family member say a sweet something or other on video and I would compile it and email it to him. This is that video, but you have to promise not to watch anything but me at 5:46 and the little kids starting at 9:05.


(I should've told my little brother - who took over videotaping for my snippet - to zoom out...You're getting a lot of chest coming at you from me...Uh, yeah. Sorry about that)

For my mother in law I got inventive. Sort of.

I saw this picture where the person was in black and white and there was bookprint lettering in the background. I LOVED the look and wanted to do a similar thing. Well, I don't really have any old books to scan in and so then I thought of using music. It worked out well.

Then I had to figure out how to get the image just right. Well I never got it in black and white EXACTLY, but I did figure something out and I loved it. So I kept with it.

I apologize for not really having any sort of tutorial in place for this, but if I get a request for a tutorial I will gladly do one....

Here's the completed picture:


Anyway, so I had planned to print these off and stick them in a frame, but when I was at The Wood Connection I saw a different way of displaying them that I liked A LOT better so I went with it.

This was a SIMPLE project. I painted the back and sides of the wood block, with very little paint on the front (the picture will cover the majority of it):


Then I mod podged the pictures to it. I painted the little bauble thing to put in the top, tied a ribbon around it and it was complete:


Such a fun, easy, but wonderful gift.

Now this gift was the same as the one for my mil, but it was made for my brother in law's on again, off again girlfriend. They were 'off' when we last heard, but last year was the same story and she showed up on Christmas and we had nothing for her.

This year I wanted to be prepared. So, I made her a quick little scrapbook page thing to put on the block. It was cute enough.


Sadly, she didn't show up this year and they may be done for good, but either way I can still keep this in my home as this girl was such a pivotal person in our lives.

Tuesday, November 1, 2011

Yabba Dabba Doo!!!

Halloween has now come and passed. But I have to share with you my 18 month old's costume and give you some background.

So sometime in September we were visiting with some of my hubby's family. My little girl had a dress with some rough shapes on it and a diaper cover that matches. I do her hair whenever we go out, but she also has a habit of pulling it out if we are in the car long enough.

So she has this dress on and her hair is looking wonderful so my brother in law says something like, "Hey, Pebbles." Then my hubby and his brother have a conversation in which my hubby mentions that our little girl was going to be Pebbles Flintstone for Halloween. This was news to me, but I went along with it.

Fast forward to looking at Halloween costumes and I just wasn't thrilled with what I was seeing.
The commercial costumes you can buy for a girl my baby's age just looked stupid. I didn't want to pay money for something so silly.

I thought, I can put something together for the same price or cheaper and be happier with the look. I wanted a certain look and everytime I got worried about getting it to look right, my hubby told me to just use the dress. I didn't want to use the dress because the colors weren't right.

So the day comes that we go buy all the kids their costumes and we stopped at Target to see what we could find that would work for a Pebbles Flintstone costume. We had a tough time finding a plain green shirt, but we eventually came across one that had ruffles on it. It was good enough. We set about finding a diaper cover in blue, but couldn't find anything.

A few weeks later I was at Gardner Village and found a tutu in green and bought that. After looking at it closer, I discovered it had little Tinkerbell bling stuff on the bottom. It wasn't going to work for Pebbles. It's cute and TINKERBELL, but it wasn't going to go well with the shirt. I then kind of spaced finding a bottom.

5 days before Halloween I decided I needed to get busy on the costume. I don't really sew and you can read a long explanation of why, here. And I was really quite nervous about it. We had no backup plan for another costume, nor did we have money to buy another costume. Anyway, I set about getting a costume together.

When I realized I forgot about a bottom, I also realized that one of my boys had a fairly 'ugly' set of shorts that would probably work if I cut the legs out and turned it into a skirt. So I grabbed that.

And I went about trying to turn this:


Into a Pebbles Flinstone looking costume.

My first step was to make a template of the 'stone pattern' in the top. This was that template:


I was using felt for the stones.


So I pinned the template to the felt and cut around the template. What made this costume nice was that it didn't have to be PERFECT, so I cut different size stones. They were all fairly close in size, but they weren't all exact.


I then placed them on the shirt and tried to get it looking like I wanted.


When I had it how I wanted, I pinned the felt to the shirt.


I then sewed the felt stones to the shirt. And even though I don't sew very much at all, it was very therapeutic on this day...

Anyway, after I sewed one side I needed to let the machine cool down. (It's an older machine and the hotter it gets, the more often the thread breaks) So while the machine was cooling down I set aside making Pebbles hair bone.

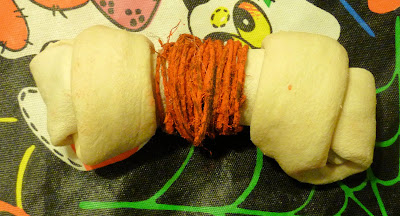
For the hair bone, I used an actual dog bone, black twine (my baby's hair is dark) and the spray color I planned on using for my daughter on Halloween).


I wrapped some twine around the bone to see how much I wanted. Then I cut the twine to that length. After that I sprayed the heck out of that black twine. (Thought I took a picture of that, but goblins must've deleted it or something...)

While that was drying I sewed the other side of the shirt.

Then I went back to the bone. I hot glued the twine to the dog bone in no real order, just kind of went with the flow. I then glued to bone to a clippy. This was the finished product:

For the skirt, I just cut the legs off the shorts:


Then I made triangle cuts in the bottom. Again thank goodness the less perfect it looks, the better it works for this costume.

This was the completed product:


And this is how it looked on my baby: (Even if she didn't want to cooperate for pictures and we live somewhere where Halloween night can get cold, thus the white pj's underneath)

Wednesday, October 12, 2011

MousePad Do-Over

I first saw this tutorial over at AGAAGG. Check it out - but make sure you have LOADS of time on your hands cause this girl is crazy creative!!!

So I had this mousepad:


It was falling apart at the seams and it didn't bother me too much cause I did buy it at the dollar store and it lasted me a couple years.

So I tore that top part off and was left with this:


Then I went about measuring the mousepad to know which size to cut my paper.


I had an off night and could NOT get the paper cut to the right dimensions and finally settled on just using the two pieces of paper and making them work together:


I then took my Mod Podge and painted it all over the mousepad and then adhered the paper to it. When that was done, I was left with some edges that were bigger than the mousepad:


I simply trimmed the excess off.

I decided I didn't like how the two papers matched up


So I simply took a coordinating piece of paper and slapped it on where the other two pieces met. I was much happier with this look:


Now I have a cutesy mousepad and it's IN SEASON!!! YAY!

SUPPLY LIST

Mousepad - bought at the dollar store
Papers - DCWV: The Fall Stack
Mod Podge
Paint Brush
Paper Trimmer
Scissors

post signature

Tuesday, June 15, 2010

Sweet Little Princess - Blocks

We welcomed my first niece yesterday and I wanted to give her something other than clothes since she already had so many.

This is what I came up with:

I know it's nothing new, and I've seen various versions around the web, but it's something I did. so I'm sharing it.


SUPPLY LIST:
PAPERS: Stampin' Up - Slumber Party
BLOCKS: Midwest Products
VINYL: Provo Craft - Chocolate
FONT: 2Peas Fragile

MOD PODGE: Plaid

post signature